
Using Sourcetree
Add a GitHub account
The source code and documentation for Miterra are hosted on GitHub.com, therefore you need a GitHub account to access these resources. If you do not have one yet, you can create one at https://github.com/signup.
In Sourcetree, click on menu . In the Options dialog, go to the Authentication page.

| 1 | Click Add to open the Edit Hosting Account dialog. |
| 2 | Choose "GitHub" for Hosting Service. |
| 3 | Choose "HTTPS" for Preferred Protocol. |
| 4 | Choose "OAuth" for Authentication. |
| 5 | Click Refresh OAuth Token. The login page for GitHub.com will open in your browser. Log into your account on GitHub, and return to Sourcetree. |
| 6 | If the login is successful, you will see the message "Authentication OK" here. |
| 7 | Click OK to close the dialog. |
You can set the newly added GitHub account as default, which means that Sourcetree uses these credentials (the username and password) to access GitHub services when no username is specified.

| 1 | In the Accounts list, click your account name to expand it, and then click Set as default. If asked to confirm, click Yes. |
Clone a Repository
Resources on GitHub are saved in containers called repositories (or repo for short). Before you can use a repository on GitHub (the remote repository), you need to download it to your local computer — a process called clone.
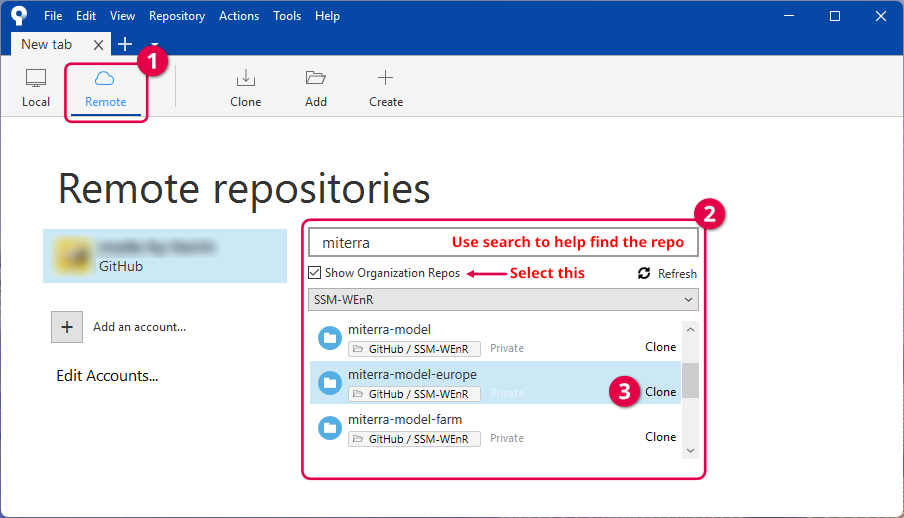
| 1 | Click Remote in the toolbar. |
| 2 | You should see your GitHub account name on the left, and a list of remote repositories from GitHub you can access on the right. Make sure that the Show Organization Repos checkbox is checked, and use the search box to help locate the repository you want to clone. |
| 3 | Once you find the repository, click Clone next to its name. |
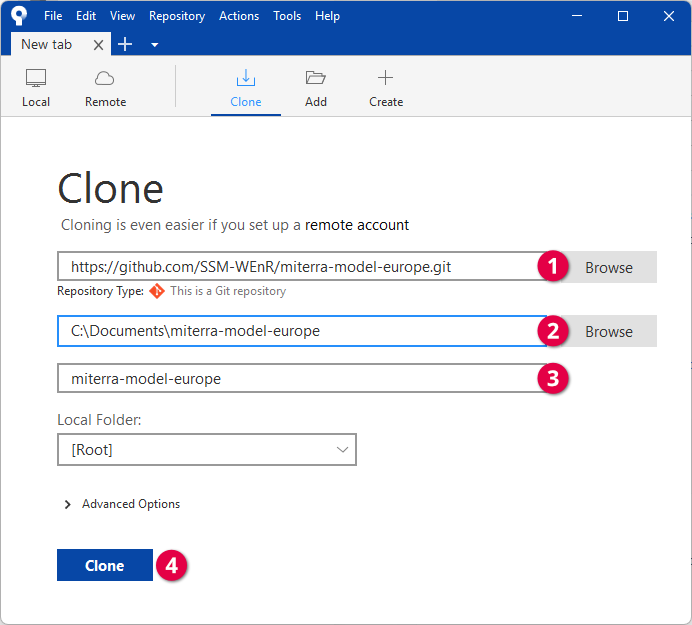
| 1 | The address to the remote repository should be filled automatically. |
| 2 | Click Browse to select the directory on your computer where you want to save the repository. |
| 3 | Give the repository a name to help identify it. By default, this is the same as the name of the remote repository. |
| 4 | Click Clone to start cloning the repository. |